

Do you have child or teen who is always taking pictures? You don’t have to be a professional photographer to get great results or to teach your kids how to. And you don’t have to have an expensive cameral, either. Whether you have a point-and-shoot, a Digital SLR, or just your phone, you can get amazing results on vacation, at special events, or just capturing life’s everyday moments.
Teaching Your Kids to Take Better Pictures
The advice I always give to people interested in photography: take a lot of pictures! You won’t know what works and what doesn’t if you don’t try. Experiment with different lighting situations, different perspectives, different subjects, and then analyze the results.
Also, it helps to study pictures you like that other people have taken. (And I’m including my photography to get you started!) Ask yourself:
- What is different about the pictures I like, versus the ones that aren’t as appealing?
- What is it about the picture that draws my eyes first?
- What time of day do I think this was taken?
To get you started, I’m sharing my top ten tips for taking better pictures.
Top Ten Photography Tips
1. Get close.
If you aren’t taking a picture of the scenery on purpose, then let the subject shine.
2. Take part pictures.
Capture the details by taking parts of babies, buildings, animals, etc.

3. Focus on relationships.
Let them shine through in your photos by not always posing them, or have people interact in some way like tickles or hugs.

4. Take images as well as pictures.
At Christmas I like to take pictures that capture the feeling of the season as well as the events. Birthday candles, Easter eggs, flowers at a celebration help capture the memories of the atmosphere.

5. Off-center your subject.
Imagine that there are lines dividing an image into thirds, both horizontally and vertically. If you place your subject at any of these intersections you can create a dynamic picture.

Get the Curriculum for your homeschool group or co-op!
6. Frame it.
Windows, playground tunnels, and trees, all make natural frames for your subject. Or highlight a feature by isolating it—for example, hide part of your subject’s face to emphasize the eyes.
7. Change your perspective.
Shoot up or down instead of eye-level. If you are taking a picture of a small child or a pet, get on their level. Yes, I’ve taken many pictures lying in the grass on my belly! Snap the picture as they walk away instead of a front view.
8. Love your lighting.
If the background is brighter than the subject, use it as a opportunity to take a silhouette.

9. Take advantage of golden opportunities.
Take pictures about an hour to 30 minutes before sunset to get a beautiful golden tint to your photos.

10. Reflect on your subjects.
Notice the reflections you see in mirrors, water, windows, and other surfaces and take advantage of the view.

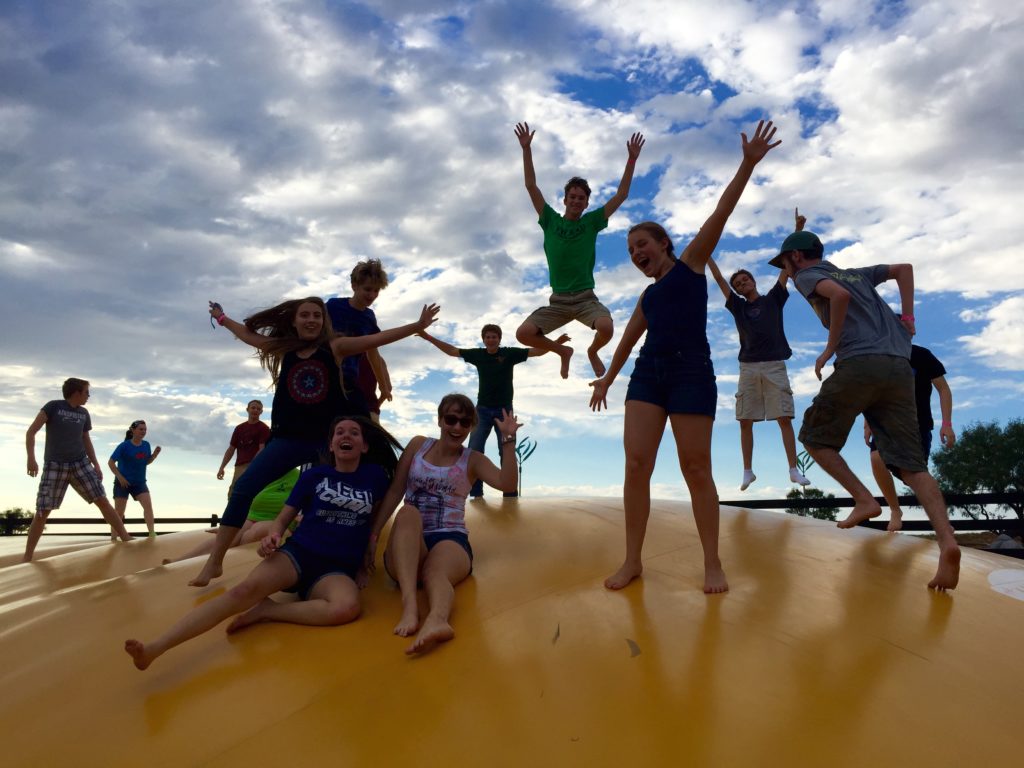
Bonus Tip:
Capture the action! (And this one that I took with my phone came out better than the one with my “real” camera!)
Curriculum for Your Family or Homeschool Group + Co-op
After you have learned to take better pictures, you can spend time studying editing. My goal as a photographer has always been to get the best shot possible before editing, though. By doing so I can spend more time taking pictures, and less time working on them later. I encourage you to do the same, because you will learn so much more—and your pictures will be so much better—when you don’t have the mindset of “Oh, I can fix that later.”
So get out there and take some pictures. A lot of pictures! Because the best way to learn to take better pics is to practice, experiment, and have fun.
I’ve teamed up with Homeschool Mastery Academy to create a delightfully different curriculum for your homeschool group or co-op! You’ll find these tips along with lesson plans to teach a unit on Photography and Poetry.
Don’t have a group? We have resources to start one! Or gather a group of friends or your own family to enjoy this 5 week curriculum: Poetry and Photography: A Homeschool Group Study of the Power of Words and Images

Course Outline:
Lesson 1: How to Write Pattern Poetry
Lesson 2: Writing Poems Inspired by Photography
Lesson 3: Tips to Take Better Pics
Lesson 4: Photography Field Trip Adventure
Lesson 5: My Photo Inspired Poem
What’s Included in the Curriculum Package:
- 24 Printables Total
- Course Introduction Handout
- Zip File Available for Immediate Download
- Lesson Plans for Each Week to Equip the Teacher or Leader with Minimal Prep Time
- Teacher’s Worksheet for Notes & Planning Your Lessons When Needed
- Inspiring Picture Packs for Teacher and Students
- Sample Poems Pack for the Teacher
- Field Trip Ideas
- Photography Tips Handout
- 6 Student Worksheet Handouts; Outlining Six Different Types of Poems and How to Write Them
- A Final Poem and Picture Worksheet for Students
- Additional Resources
- 2 Graphics and 1 Course Description Letter Designed for Sharing on Social Media or Use in Emails to Invite Others to Join the Study
✣
© Kay Dawn Chance, Kay Chance Photography, and Cultivate My Heart, 2017. Unauthorized use and/or duplication of this material (including the photos in this post) without express and written permission from this site’s author and/or owner is strictly prohibited. Excerpts and links may be used, provided that full and clear credit is given to Kay Chance and Cultivate My Heart with appropriate and specific direction to the original content.
This article was adapted from one I wrote for the 2015 Christmas Edition of Homeschooling Today Magazine.
Your pictures are so beautiful! So alive and the feelings really shows. Like food for my soul <3
I guessing that all pics on the blog are your own? If that's the case, why not sign the ones you are using in the blog in general so readers instantly can find out that it's your own pictures? I had to admit that I thougt that this was a "bought-pictures-blogger" but was just gonna check this page with tips…
Hi! Thanks so much 🙂 For the most part, I use paid and common use stock photography for my posts with only a few of my personal pictures thrown in. I hope to move to using more of mine in the future, but I don’t have images to go with all my topics right now. As for this particular post, they are my photos (except for the featured photo on the blog) and I’m planning on doing a few more posts in relation to teaching & learning photography. Thank you again! I’ll definitely look into signing my own so people will know.
I have noticed I love flowers and candid kid shots. Kids smiles and beautiful flowers are so bright and happy. I love it! I guess that explains my instagram.
And photos of things we love are a great way to lift our moods!
I’m not a kid, but I sure
Loved the tips. I’m going to go over them again!
Yes! And when we learn things ourselves, we are modeling the importance of life-long learning to our kids. Always a powerful thing 🙂
These shots are gorgeous! I love photography and I started teaching my son in his fourth-grade year of our homeschool. So much fun!
Thanks so much! One of the things I love about homeschooling is sharing our passions with our kids!